What's your workflow?

Before I start to describe my personal workflow, I would like to point out that I won’t discuss every single option or piece of software I use. This article will mainly focus on my set-up, explain why I chose certain pieces of hardware and how these choices suit my workflow.
Looking at the way I used to work, I realise it took me years to establish an efficient workflow. For over 20 years, I have been a hard-core Windows user. So sticking with Windows as a professional, seemed like an obvious choice. I started out with a custom build workstation with a six core CPU, 12TB of internal storage, 32 Gb of memory and a whole bunch of external Western Digital disks as a backup medium. Why I chose internal hard disks as my primary storage? One word: performance. Internal disks still have the fastest transfer speeds, no matter what external disk or interface you use. So my computer was equipped with several hard disks in different sizes, that contained all of my data and images. A backup program called SynbackSE kept my internal and backup disks in sync, while from time to time a third backup copy was made to another set of external disks (older disks that grew to small as my number of images kept increasing). I stored this third backup at my father-in-law’s house, in case I got robbed or my house burnt down (which of course I hope will never happen). As my business kept developing and I started to go on more trips, lectures and workshops, I was constantly copying files (e.g. PowerPoint presentations, articles, website files, invoices, Lightroom catalog, etc.) from one computer to another. It became a real hassle to keep both computers in sync. Around that same time, I was also in need of a new laptop and decided to switch to a Macbook Pro. Its impressive screen resolution, performance and battery life finally convinced me to take the leap. But this decision complicated my whole synchronising process even further. The two systems were simply incompatible. It was time for a change.
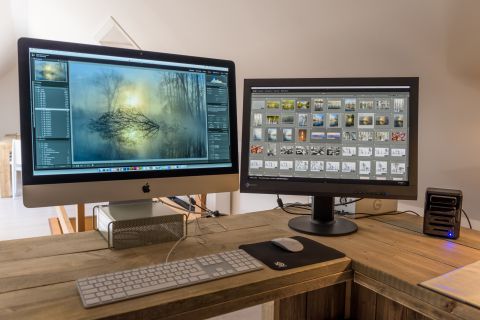
Pretty soon, I found the saying to be true: once you go Mac, you never go back. Mac has an undeniable ease of use and simplicity to get certain tasks done. All of a sudden, I could work for 8 hours on 1 battery charge, switch from mirrored to extended screens on my beamer without any hassle and no longer had to wait for updates to finish when putting my computer to sleep or shutting it down. With its high performance and lightweight OS, I was slowly getting hooked on Apple. I decided to sell my workstation, buy an iMac and update my workflow. No more internal storage and endless synchronising. I switched to external disks, which can easily be used both on the iMac and Macbook. However, the external disks had to be fast and reliable or they would slow down my workflow. After extensive research online, I ended up with 5 disks:
- A Seagate Backup Plus fast 4TB which I use as the primary disk for all of my data (workshops files, presentations, invoices, etc.). This disk does not contain any raw files. I chose the Seagate disk because it is the fastest bus powered hard disk available for the moment. You don’t need an external power supply to use it and with 4TB, it has plenty of storage. The disk uses two 2,5’’ hard disk in RAID 0 to obtain high transfer speed up to 200Mb/s.
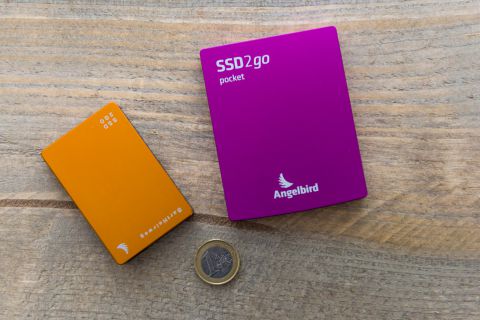
- An 512Gb Angelbird SSD2go POCKET, which I use for my Lightroom Catalog (including smart previews and backups). Despite its small size, this Angelbird SSD disk is incredibly fast and allows transfer speeds up to 450Mb/s, making it the perfect choice to run a huge 4Gb Lightroom Catalog, without having to sacrifice performance.
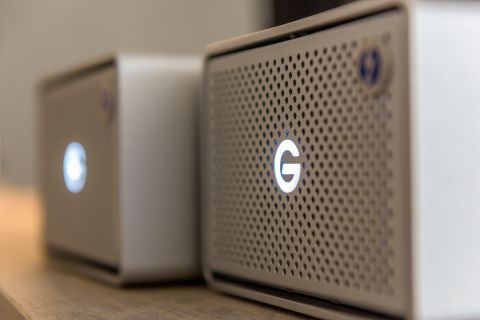
- A 12TB G-Technology G-Raid with Thunderbolt, which I use as the main storage for all of my raw files. The G-Raid uses two 6GB disks in RAID 0 and allows transfer speeds up to 400Mb/s. It boasts a beautiful design and metallic finish that matches my iMac.
- A huge 16TB G-Technology G-Raid with Thunderbolt, which serves as a backup disk for the aforementioned three disks.
- A 512Gb Angelbird SSD2go PKT. This disk is even smaller (not bigger than a box of matches) than the SSD2Go POCKET, while still achieving the same transfer speeds. I use it as a backup disk when travelling. I always store another copy of those on my Macbook’s internal disk. Better safe than sorry.

Now how do these hardware choices fit my workflow process? When I return from a shoot, I import my Lexar memory cards into Lightroom using a Lexar Professional Workflow HR2 card reader. I chose Lexar several years ago for its reliability and speed, both during capture and when copying images and videos to my computer. When importing images into Lightroom, smart previews are generated. Both the previews and the catalogue are stored on the Angelbird SSD2go pocket. All I need when I am working on location or travelling, is the small SSD disk to edit my images on the go. As soon as I get back home, the changes made to the smart previews are synchronised with the original raw files.

What about the RAW files? I store these on the 12TB G-Raid disk. I usually do not need them when I’m travelling, so this disk always stays with my iMac. A backup program called ChronoSync takes care of daily backups, copying the RAW files, the Lightroom catalogue on the SSD2GO and the data stored on the Seagate disk to the 16Gb G-Technology G-Raid disk.
This Seagate disk contains all of my work-related files, such as PowerPoint presentations, workshop documents, invoices, website files, software, etc. I always take it with me whenever I’m working on location and I don't need a powersupply because it's bus-powered. Even though I don't take my RAW files with me, I do keep a high resolution JPEG version of my favourite images (the ones that were flagged and edited in Lightroom) on the Seagate disk. Doing so, I always have my finished images with me in case a client asks for a specific image.
Finally, I still use my old Western Digital external disks as a third backup copy, stored on another location.
It took me some time to get everything running, but this new setup and workflow seems to be working well now. The hard drives are reliable and fast and I haven’t noticed any delays by using external disks. The most important thing, however, is that I can keep working on my files and edit my images, without having to synchronise anything when I return home.
If you're wondering whether that switch from PC to Mac went smoothly, I can confirm you that it didn’t! There’s a lot to like about Mac, but the system also has some drawbacks. First of all, Mac is very picky when unmounting disks. I was used to just pulling disks out of my PC. Do that on a Mac and your disks will - more often than not - end up corrupted. So in the beginning, I spent a lot of time repairing disks and getting them to mount again. Furthermore, the saying that Mac never crashes is simply not true. Recently, my Macbook didn’t allow me to login anymore (even though I was definitely using the correct password). As this happened minutes before I had to give a lecture to more than a hundred people, my puppy love for Apple suffered a severe dent. But all in all, I would still recommend it. It has certainly facilitated my workflow process and hey, nobody's perfect, right?
